Create a new patient
1. Begin the process
Click on Add new patient on the dashboard.
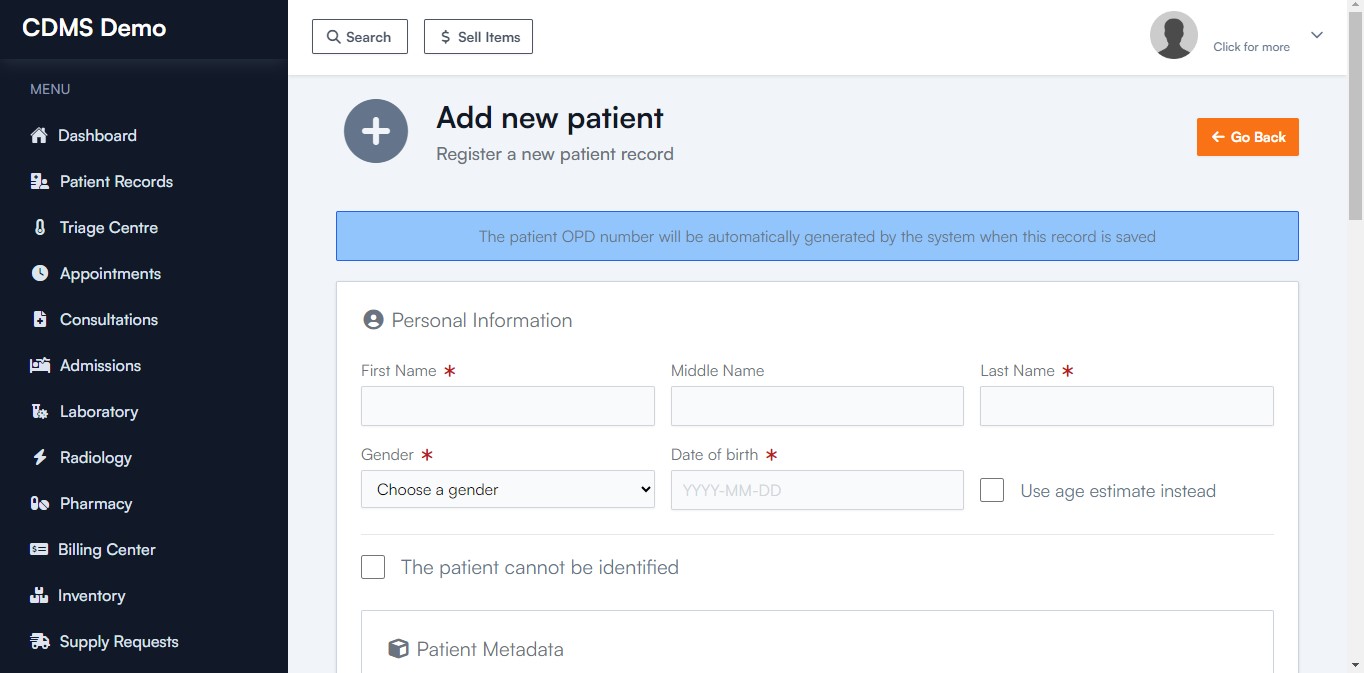
An add new patient page is displayed as seen below.

Once redirected successfully, a form to fill in the new patient details will be shown. It has 5 sections namely:
- Personal Information
- Patient Metadata
- Contact Information
- Donor Information
- Location Information
- Other Information
2. Personal information.
Fill in the personal details of the new patient correctly.
Details include :
- Patient's full name
If unknown, check The patient cannot be identified button checkbox below the name fields.
- Patient's gender
- Patient's date of birth
If the DOB is unknown, check the Use age estimate instead checkbox and fill in a plausible age estimate of the patient
3. Patient Metadata
This is where we add supplementary data that provides additional context to the patient's main health records.
- Patient's marital status
- Patient's serostatus
- Patient's blood group
- Patient's rhesus factor
- Patient's Identification type
- Patient's Identification number
- Patient's NHIF number
- Patient's Universal Healthcare Number
- Patient's NCPWD number
4. Contact Information
Fill in the contact information of the patient i.e., telephone number and email address.
5. Donor Information
If the patient is insured by a donor, select the donor from the dropdown list.
6. Location Information
Add the location information of the patient i.e., their nationality, county and sub-county information if they are Kenyan, their address information, their sublocation and a vilage, estate or landmark of where they are located.
7. Other Information
This is an optional section where you can specify how the patient came to know about your clinic. This information may assist you in identifying your strong and weak areas in your marketing strategies.
When registering unknown patients, fields you are unsure of can be left blank. Only fields that are marked with an asterisk (*) are required.
8. Save the Patient record
Once all the fields have been filled, you can click Save Patient button to save the records and register the patient.
You will be redirected to the registered patient's details page with a success message of 'Patient details have been saved'